Restoration and editing with free software
Turning masters into finished access copies: photo repair, colour, video deinterlacing and trimming, audio clean-up, AI tools and the rules that keep restoration honest.
🧰 What you'll need
Every tool and supply named in this unit. Dotted-underlined words in the text jump back here. Buttons open that store's search for the exact product. Prices are rough ranges in Canadian dollars.
Polarizing filter and film $25 to $100
What it is: A filter that screws on the lens, and plastic sheets that go over the lights. Together they remove glare from glass and glossy photos.
Our pick: Circular polarizer (Hoya or K&F Concept) in your lens thread size, plus linear polarizing film sheets
In a store: Camera store
The rules of restoration
- 1Never edit a master
Open the master, immediately "Save As" or export a copy into 2_WORKING, edit the copy.
- 2Restore what was there. Do not invent.
Removing a scratch is restoration. Adding a missing face is fiction.
- 3Light hand
If someone can tell it was edited, it is too much.
- 4Every job gets the basic finish
Rotate, crop, colour balance, dust. Deeper repair is done only when the job sheet says so.
- 5Label anything AI-generated or heavily reconstructed
File name ends
_restoredor_AI-enhanced, and the unedited version is always delivered beside it.
The free toolkit
| Job | Tool | Notes |
|---|---|---|
| Photo editing and repair | GIMP 3 | Heal, clone, levels, curves, perspective |
| RAW and batch photo colour, negative conversion | darktable or RawTherapee | Copy settings across a batch |
| Batch rename, resize, convert | XnConvert, or ImageMagick | Thousands of files in one go |
| Organize, tag, find faces and duplicates | digiKam | Writes names and dates into the files |
| Dates and metadata | ExifTool | Sets "date taken" so scans sort by the real year |
| Upscaling photos | Upscayl | AI upscaler. Access copies only, labelled. |
| Video editing, colour, speed | DaVinci Resolve (free edition) or Shotcut | Resolve needs a strong computer |
| Video converting and deinterlacing | HandBrake; ffmpeg; Hybrid or StaxRip for QTGMC | QTGMC tools are Windows only |
| Audio | Audacity | Record, trim, split, click and noise repair |
| Playing and checking anything | VLC, MediaInfo | MediaInfo shows the exact format of a file |
🏷️ Porthos station card fill in once, it saves on this computer
Photos: the basic finish
- 1Open the copy in GIMP
- 2Rotate upright
Image, Transform. For slightly crooked scans: Rotate tool, or Measure tool along an edge then "Straighten".
- 3Crop
Crop tool to the edge of the picture. Keep white borders with handwriting or dates.
- 4Levels (Colors, Levels)
Drag the black slider to where the histogram begins and the white slider to where it ends. Do not cut into the data.
- 5Colour cast
In Levels, use the grey-point picker on something that should be neutral grey. Or Colors, Auto, White Balance as a first try.
- 6Dust and small spots
Heal tool (H). Ctrl-click clean texture nearby, then dab on the spot. Small brush, a little bigger than the spot.
- 7Export as JPEG quality 92
File, Export As. Name matches the master.
Faded colour prints and slides
- 1Colors, Levels. Choose the Red channel. Pull black and white sliders in to the ends of that channel's histogram.
- 2Repeat for Green and Blue
- 3Return to Value. Adjust the middle slider for brightness.
- 4Fine-tune with Colors, Color Balance
Skin tones and anything white are your guides.
Scratches, tears and missing pieces
- 1Zoom to 100 to 200%
- 2Heal tool for scratches on smooth areas
Short strokes along the scratch.
- 3Clone tool for edges and patterns
Ctrl-click the source so the pattern lines up, then paint.
- 4Tears: align first
If the scan shows a gap, select one side and move it to close the gap before healing the seam.
- 5Large missing areas of plain background
Select the area, Filters, Enhance, Heal Selection (Resynthesizer plug-in).
- 6Missing faces, hands, or important detail: stop.
Supervisor and client decide. We do not invent people.
- 7Compare before and after often
Toggle the layer's eye icon.
Texture, glare and halftone
- Silk or honeycomb paper texture: two scans 180 degrees apart, layered and aligned, top layer at 50 percent. The texture's highlights cancel.
- Halftone dots (newspaper): descreen at scan time. In GIMP afterward: a slight Gaussian blur of 1 to 2 pixels, then reduce size by half, then sharpen lightly.
- Silvering (a bluish metallic shine in the dark areas of old prints): reduce at capture with the camera and polarizers (Unit 6). Hard to fix afterward.
Batches
- 1Rename by job pattern
XnConvert or digiKam batch rename.
- 2Set dates
ExifTool writes the real date into "date taken" so phones and photo apps sort correctly:
exiftool "-AllDates=1987:06:14 12:00:00" file.jpg - 3Convert masters to JPEG access copies in one batch
XnConvert: add folder, action Resize if required, output JPEG 92, keep folder structure.
- 4Keywords and names
digiKam writes people, places and captions into the files themselves, so they travel with the photo.
AI tools: where we draw the line
| Tool type | Acceptable use | Not acceptable |
|---|---|---|
| Upscaling (Upscayl, Real-ESRGAN) | A labelled access copy for a large print | Replacing the master. Calling it "higher resolution scan". |
| Scratch and dust removal | Access copies, checked at 100% for invented detail | Unchecked batch runs |
| Face enhancement and "restore face" | Only when the client asks, delivered beside the untouched version and labelled | Default use. These tools redraw faces: the result may not look like the real person. |
| Colourizing black and white | Only on request, labelled as an interpretation | Presenting guessed colours as fact |
| Generative fill for missing areas | Plain backgrounds, on request, labelled | Faces, people, text, anything that changes what the photo records |
| Video upscaling and frame interpolation | Labelled access copy on request | Masters |
Video: from master to MP4
Simple route: HandBrake
- 1Open the master file
- 2Dimensions
Storage size stays 720 x 480. Anamorphic "automatic" or set display to 4:3. No upscaling unless requested.
- 3Filters: Deinterlace = Bwdif (or Decomb), preset Bob
"Bob" turns 29.97 interlaced into 59.94 progressive: smooth, natural motion.
- 4Filters: Denoise off or light. Heavy denoise smears faces.
- 5Video: H.264, Constant Quality RF 18, framerate "same as source"
- 6Audio: AAC 192 kbps
- 7Start. Then check the file: beginning, middle, end, with sound.
Editing route: DaVinci Resolve or Shotcut
- 1New project. Timeline 720 x 480 (or 1440 x 1080 if upscaling was requested), 59.94 or 29.97 fps, 4:3.
- 2Import the master. Confirm field order in clip attributes.
- 3Trim
Cut dead blue screen and long snow at the start and end. Keep everything in between unless the job sheet says otherwise.
- 4Split into events with markers or separate timelines
Name by what the client told us: "Christmas 1991".
- 5Crop the head-switching noise
The flickering line at the very bottom of every VHS picture. Crop about 8 to 12 lines and mask to black. Do not stretch the picture to hide it.
- 6Colour
Use the scopes. Lift blacks to true black, bring whites under 100, balance on something white.
- 7Audio
Normalize peaks to about -3 dB. Remove steady hum with a gentle high-pass filter around 60 to 80 Hz.
- 8Export H.264 MP4
✔ Do
✘ Do not
- Stretch 4:3 video to fill a 16:9 screen
- Add fake film grain, transitions or music unless ordered
- Deinterlace a file that is already progressive
Audio: clean-up in Audacity
- 1Open the master WAV. Immediately "Save Project As" in 2_WORKING.
- 2Trim start and end. Leave 1 second of quiet.
- 3Mono source?
Listen to each channel alone. Keep the cleaner one (Split Stereo to Mono, delete the worse), or mix both.
- 4Clicks (records)
Select the audio, Effect, Noise Removal and Repair, Click Removal. Start with threshold 200, max spike width 20. Listen. Large single clicks: zoom in, select the click only (under 128 samples), Effect, Repair.
- 5Hiss and hum (tape)
Select 1 to 2 seconds of noise with no speech or music. Effect, Noise Reduction, Get Noise Profile. Select all. Noise Reduction again: start at 6 to 9 dB, sensitivity 6, smoothing 3. Preview.
- 6Listen for the "underwater" sound
Swirling, metallic, bubbly artefacts mean too much reduction. Undo and use less.
- 7Normalize to -1 dB
- 8Split tracks
Click at each gap, Ctrl-B to add a label, type the title. File, Export, Export Multiple, split by labels.
- 9Export MP3 320 kbps or FLAC
| If you see or hear | Likely cause | Do this |
|---|---|---|
| Photo looks grey and flat after editing | Levels not set | Black and white sliders to the histogram ends |
| Skin looks orange, green or purple | Colour cast overcorrected | Reset. Balance on a neutral grey or white instead of on skin. |
| Healed area looks smudged | Brush too big or soft, same source reused | Smaller brush, pick new sources often |
| MP4 has comb lines on motion | Not deinterlaced | Turn the deinterlace filter on |
| MP4 motion looks jerky | Deinterlaced to 29.97 instead of 59.94, or wrong field order | Use Bob mode. Swap field order. |
| People look wide | Wrong aspect ratio | Set display aspect to 4:3 |
| Audio sounds underwater | Noise reduction too strong | Use 6 dB or less |
| Sound and picture drift apart | Dropped frames in the capture | Recapture with TBC (Unit 11) |
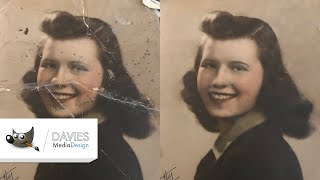 ▶Repairing a badly damaged old photo in GIMP👀 Watch for: heal and clone on tears and creasesOpens on YouTube in a new tab
 ▶Restoring old photos in GIMP👀 Watch for: the basic sequenceOpens on YouTube in a new tab
 ▶The Heal tool in GIMP👀 Watch for: picking the source pointOpens on YouTube in a new tab
 ▶Removing cracks with the heal tool👀 Watch for: short strokes along the crackOpens on YouTube in a new tab
 ▶Audacity's audio restoration tools👀 Watch for: noise reduction and click removal in useOpens on YouTube in a new tab
 ▶Click Removal in Audacity👀 Watch for: the two slidersOpens on YouTube in a new tab
 ▶Repair effect for single clicks👀 Watch for: selecting only the clickOpens on YouTube in a new tab
 ▶Cleaning up a vinyl capture👀 Watch for: before and afterOpens on YouTube in a new tab
 ▶Splitting tracks in Audacity👀 Watch for: labels at each gapOpens on YouTube in a new tab
📝 Worksheet 17: Restoration and editing with free software
Part A: Quick check
Click one answer. Green means correct. Red means try again. You can try as many times as you need.
1. What is the first thing you do after opening a master file to edit?
✅ Masters are never edited.
2. Which change is restoration, not invention?
✅ Restoration returns the photo to what it recorded.
3. A faded colour print has turned red. Fastest correct fix in GIMP?
✅ Each dye faded differently, so each channel needs its own correction.
4. The MP4 of a VHS capture should be deinterlaced to:
✅ Bob keeps both fields as full frames, so motion stays smooth.
5. Audio sounds bubbly and metallic after noise reduction. What do you do?
✅ That sound is the artefact of too much reduction.
6. A client photo was run through an AI face enhancer. How is it delivered?
✅ AI may change how a person looks. The real record must be there too.
7. What do you do about the flickering line at the bottom of VHS video?
✅ Stretching distorts everything. Masking hides only the noise.
8. Which channel often hides a yellow stain on a black and white photo?
✅ Stains absorb some colours more than others.
Part B: Hands-on practice
Do each task with real equipment and practice media. Tick it when you have done it. Your trainer signs when they have watched you do it.
| I did it | Task | Trainer initials |
|---|---|---|
| Do the basic finish on 10 practice scans in GIMP. | ||
| Correct a red-faded colour print with per-channel Levels. | ||
| Repair a scratch and a tear with Heal and Clone on a duplicate layer. | ||
| Remove a stain using channel decompose. | ||
| Batch-convert and rename a folder of masters to access JPEGs. | ||
| Write a date into a file with ExifTool and confirm it shows in a photo app. | ||
| Make a correct deinterlaced MP4 from a practice VHS master in HandBrake. | ||
| Trim, mask head-switching noise and split a tape into named events. | ||
| Clean a practice record capture (clicks) and a cassette capture (hiss), then split and export tracks. |
Part C: Write or draw your answer
1. Give one example of restoration and one example of invention.
2. Describe the "underwater" sound and what causes it.