Negatives and film strips
Every still-film format from disc film to glass plates: handling, flattening, capturing, and converting the orange negative into a correct positive with free software.
🧰 What you'll need
Every tool and supply named in this unit. Dotted-underlined words in the text jump back here. Buttons open that store's search for the exact product. Prices are rough ranges in Canadian dollars.
Nitrile gloves, powder-free under $25
What it is: Thin disposable rubber-like gloves. They keep skin oil off film and glossy photos and still let you grip.
Our pick: Any powder-free nitrile exam gloves, in your size (S, M, L). Not latex, not vinyl.
In a store: Pharmacy, Costco, hardware store
Rocket blower under $25
What it is: A rubber bulb you squeeze. It puffs clean dry air to push dust off without touching.
Our pick: Giottos Rocket Air Blaster, large
In a store: Camera store
Anti-static brush $25 to $100
What it is: A very soft brush whose fibres remove static, so dust lets go of film and prints.
Our pick: Kinetronics StaticWisk, 2 inch or 4 inch
In a store: Camera store
PEC-12 film cleaner $25 to $100
What it is: A solvent made for cleaning film and slides. Removes fingerprints, grease and mold residue. Supervisor only, ventilated.
Our pick: PEC-12 Photographic Emulsion Cleaner, 4 oz
In a store: Camera store
PEC pads (lint-free wipes) under $25
What it is: Very soft wipes that shed no fibres. Used with PEC-12 on film, and with film cleaner on movie film.
Our pick: PEC*PAD lint-free wipes, 4x4 inch, pack of 100
In a store: Camera store
Black backing paper under $25
What it is: Plain matte black paper, card or cloth. Stops show-through behind thin pages and blocks stray light around film and frames.
Our pick: Black cardstock and one sheet of black foam board
In a store: Michaels, dollar store
Film and slide holder $100 to $500
What it is: A frame that holds a slide or film strip flat and square over the light and blocks stray light around it.
Our pick: Valoi easy35 or Valoi 360 system. Budget for slides: JJC FDA-S1 slide copy adapter.
In a store: Camera store
Film-capable flatbed scanner $100 to $500
What it is: A flatbed with a light in its lid, so it can scan slides and negatives. Our ET-2750 does not have this.
Our pick: Epson Perfection V600 Photo
In a store: Staples, camera store
Dedicated film scanner $100 to $500
What it is: A small scanner made only for 35 mm slides and negatives, with infrared dust removal.
Our pick: Plustek OpticFilm 8200i
In a store: Camera store
What a negative is
- Light and dark are reversed. Colours are reversed and sit under an orange mask.
- A negative holds more detail and more tonal range than the print made from it. If the client has both, the negative usually gives the better result.
- Like slides, negatives must be lit from behind. The ET-2750 and FastFoto cannot capture them.
Handling
✔ Do
- Nitrile gloves, always
- Hold strips by the edges, like a CD
- Keep strips in their sleeves until the moment of capture, and return them to the same sleeve
- Copy any writing on the sleeve or envelope into the job sheet
✘ Do not
- Cut negatives. Ever. Not even to fit a holder.
- Pull film out of an APS cartridge by hand
- Lay negatives directly on a table: put them on a clean sheet of paper
- Tape negatives into a holder across the image area
Reading the edges
- Frame numbers along the edge (12, 12A, 13) give the order. Capture in number order.
- Words on the edge (KODAK GOLD 200, FUJI, ILFORD HP5) name the film. This helps colour conversion.
- Notches on sheet film show the emulsion side: notches at the top right = emulsion facing you.
Clean and flatten
- 1Blower, both sides
- 2Anti-static brush if dust clings
Negatives hold static. One light pass.
- 3Curled strips
Put the strip in a clean sleeve, between two sheets of paper, under heavy books for 24 to 48 hours.
- 4Strong lengthwise curl
Use a holder that clamps both edges, or anti-Newton-ring glass. Supervisor.
- 5
Special formats
| Format | How we capture it |
|---|---|
| 110 | A 110 holder or mask. High magnification. Expect grain. |
| 126 | 35 mm holder masks the square frame: use a 126 mask or medium-format holder with a card mask |
| APS | APS adapter that advances the film from its cartridge. If we have no adapter, tell a supervisor: a lab can cut and sleeve it only with client consent. |
| Disc film | Each tiny frame captured at maximum magnification. Mask the rest of the disc with black card. Results are grainy; that is the format. |
| 120 roll film | Medium-format holder. Watch for film sag in the middle of long frames. |
| Sheet film 4x5 and larger | Flat on anti-Newton glass over the light, masked with black card |
| Glass plates | Emulsion side up, never slid, on a clean padded light surface. Two hands. Supervisor. Cracked plates are not moved without support under the whole plate. |
| Negatives from the 1920s to 1940s that smell or are wavy | Possible nitrate or decaying acetate. Unit 2 hazard. Stop. |
Capture method 1: camera scanning
Same rig as slides (Unit 8, camera diagram). Differences for negatives:
- 1White balance on the bare light, as for slides.
- 2Mask everything around the frame
Light leaking through sprocket holes and around the strip causes flare and wrong colours. The holder or black card must block it.
- 3Include a little of the orange film border in the first frame of each roll
The conversion software uses it to measure the orange mask.
- 4Expose brighter than the meter suggests
The histogram should sit to the right without touching the right edge. Negatives are dense; underexposure makes noisy shadows.
- 5Same exposure for the whole roll
Do not let the camera change exposure frame to frame. It makes conversion inconsistent.
- 6Emulsion side toward the lens. Flip the batch in software.
- 7Advance by strip, check focus every strip
Capture method 2: flatbed with transparency lid
- Document Type
- Film (with Film Holder)
- Film Type
- Color Negative Film, or B&W Negative Film
- Image Type
- 48-bit Color (16-bit Grayscale for B&W)
- Resolution
- 3200 dpi for 35 mm, 2400 for 120
- Digital ICE
- ON for colour negatives. OFF for black and white.
- 1Shiny side down in the holder
Edge numbers read correctly from above.
- 2Check each preview frame box
The software often cuts dark frames in half. Drag the boxes by hand.
- 3Scan
Capture method 3: dedicated film scanner
Feeds or holds a strip, scans one frame at a time, infrared dust removal built in. Highest real resolution for 35 mm. Follow the station card.
🏷️ Porthos station card fill in once, it saves on this computer
Converting negative to positive, free tools
A capture of a negative is orange and reversed. Conversion turns it into a normal picture.
| Tool | Cost | Notes |
|---|---|---|
| darktable, negadoctor module | Free | Our default for camera scans. Steps below. |
| RawTherapee, Film Negative tool | Free | Pick two neutral spots, it solves the colour |
| Scanner software (Epson Scan 2 on a photo flatbed, or the film scanner's own software) | Included | Converts during the scan when Film Type is set to negative |
| Manual in GIMP | Free | Invert, then set black, white and grey points per colour channel. Slow, for one-offs. |
| CineStill CS Negative+ tools, Filmomat SmartConvert, VueScan | Paid or bundled | Good, only if Porthos already owns them |
| Negative Lab Pro | Paid, needs Adobe Lightroom | Not used here |
darktable negadoctor, step by step
- 1Import the RAW files of one roll
- 2Rotate and flip so the picture reads correctly
- 3Crop to inside the frame edge
Leave the film border out of the crop for now, after you have used it in step 5.
- 4Open the module "negadoctor"
Choose colour or black and white film stock.
- 5Film base colour: use the picker on the orange border
Bare film between frames or at the edge.
- 6D max: picker on the whole image area
Sets the range.
- 7Scan exposure bias: adjust until the darkest shadows are deep but not blocked
- 8Corrections tab: shadows and highlights colour cast
Pick a spot that should be neutral dark, then one neutral light.
- 9Print properties tab: paper black, grade (contrast), gloss, exposure
Adjust to taste, lightly.
- 10Copy the settings and paste to every frame on the same roll
Then fine-tune frames that need it.
- 11Export
16-bit TIFF master-derivative and JPEG access copy.
| If you see or hear | Likely cause | Do this |
|---|---|---|
| Positive has a strong blue or cyan cast | Orange mask not removed: base colour not sampled | Re-pick film base on the border |
| Colours differ frame to frame | Auto exposure or auto white balance was on during capture | Recapture with fixed manual settings |
| Bright haze at frame edges | Light leaking around the film | Mask with black card |
| Concentric rainbow rings | Film touching glass | Anti-Newton glass or a glassless holder |
| White specks and hairs | Dust | Reclean and recapture |
| Picture reversed left to right | Captured from the emulsion side and not flipped | Flip horizontally |
| Dense black frame with faint image | Overexposed negative | Longer shutter time. It is still recoverable. |
| Very thin, pale frame | Underexposed negative | Capture as is. Shadows will be grainy. Note it for the client. |
 ▶Scanning 35 mm negatives with a camera rig👀 Watch for: masking and film advanceOpens on YouTube in a new tab
 ▶Camera settings and workflow for scanning film👀 Watch for: levelling the cameraOpens on YouTube in a new tab
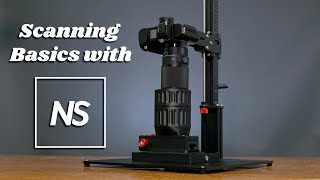 ▶Scanning film with a digital camera, basics👀 Watch for: holder and lightOpens on YouTube in a new tab
 ▶Scanning 35 mm and 120 at home👀 Watch for: changing holders between formatsOpens on YouTube in a new tab
 ▶Converting negatives with darktable negadoctor👀 Watch for: picking the film base colourOpens on YouTube in a new tab
 ▶Editing colour negatives for free in darktable👀 Watch for: the orange turning into a normal pictureOpens on YouTube in a new tab
 ▶Black and white negatives in darktable👀 Watch for: the black and white stock settingOpens on YouTube in a new tab
 ▶Scanning 35 mm colour film on a flatbed👀 Watch for: loading the strip holderOpens on YouTube in a new tab
 ▶Plastic negatives, glass plates and lantern slides on a flatbed👀 Watch for: how glass plates are laid downOpens on YouTube in a new tab
 ▶Keeping negatives clean👀 Watch for: the dust routineOpens on YouTube in a new tab
 ▶Flattening curly 35 mm strips👀 Watch for: the pressing methodOpens on YouTube in a new tab
📝 Worksheet 9: Negatives and film strips
Part A: Quick check
Click one answer. Green means correct. Red means try again. You can try as many times as you need.
1. A client has both prints and their negatives. Which usually gives the better scan?
✅ The negative is the original and holds more detail and tonal range.
2. A negative strip is too long for the holder. What do you do?
✅ We never cut client negatives.
3. In negadoctor, where do you sample the film base colour?
✅ The unexposed border is pure orange mask.
4. What happens if the camera is left on auto exposure for a roll?
✅ Conversion relies on every frame being captured identically.
5. Glass plate negatives are laid down:
✅ The emulsion scratches against anything it slides over.
6. APS film is stored:
✅ It needs an adapter to advance. Never pull it out by hand.
7. Infrared dust removal for black and white negatives should be:
✅ Silver blocks infrared, so the software mistakes the image for dust.
8. Your histogram for a camera-scanned negative should:
✅ Brighter exposure gives cleaner shadows after inversion.
Part B: Hands-on practice
Do each task with real equipment and practice media. Tick it when you have done it. Your trainer signs when they have watched you do it.
| I did it | Task | Trainer initials |
|---|---|---|
| Find the emulsion side and frame order on 5 different strips. | ||
| Identify 35 mm, 126, 110, APS, 120 and disc film from the practice set. | ||
| Flatten a curled strip using the sleeve-and-books method. | ||
| Capture a full strip of colour negatives with fixed manual settings and correct masking. | ||
| Convert one roll in darktable negadoctor, including copy and paste of settings across the roll. | ||
| Convert a black and white strip. | ||
| Diagnose 3 faulty practice conversions using the troubleshooting table. |
Part C: Write or draw your answer
1. Why must light around the edges of the film be masked?
2. List the negadoctor steps in order, in your own words.