Movie film: 8 mm, Super 8 and 16 mm
Inspecting, cleaning, repairing and scanning home movie film frame by frame, including splices, leader, shrinkage, vinegar syndrome and sound film.
🧰 What you'll need
Every tool and supply named in this unit. Dotted-underlined words in the text jump back here. Buttons open that store's search for the exact product. Prices are rough ranges in Canadian dollars.
Nitrile gloves, powder-free under $25
What it is: Thin disposable rubber-like gloves. They keep skin oil off film and glossy photos and still let you grip.
Our pick: Any powder-free nitrile exam gloves, in your size (S, M, L). Not latex, not vinyl.
In a store: Pharmacy, Costco, hardware store
Rocket blower under $25
What it is: A rubber bulb you squeeze. It puffs clean dry air to push dust off without touching.
Our pick: Giottos Rocket Air Blaster, large
In a store: Camera store
Anti-static brush $25 to $100
What it is: A very soft brush whose fibres remove static, so dust lets go of film and prints.
Our pick: Kinetronics StaticWisk, 2 inch or 4 inch
In a store: Camera store
Painter's tape under $25
What it is: Low-tack paper tape that peels off cleanly. For labelling containers and holding cracked glass together. Never on a photo, film or tape surface.
Our pick: ScotchBlue Original painter's tape, 24 mm
In a store: Hardware store
Loupe (magnifier) under $25
What it is: A small strong magnifying glass you hold close to the item. For checking film perforations, print type and dust.
Our pick: Carson 10x loupe, or any 8x to 10x photo loupe
In a store: Camera store
LED light pad $25 to $100
What it is: A thin flat panel that glows evenly. For looking through slides, negatives and film. Used for viewing, not for capture.
Our pick: Huion A4 LED light pad
In a store: Art store
PEC pads (lint-free wipes) under $25
What it is: Very soft wipes that shed no fibres. Used with PEC-12 on film, and with film cleaner on movie film.
Our pick: PEC*PAD lint-free wipes, 4x4 inch, pack of 100
In a store: Camera store
Small zip bags under $25
What it is: Clear resealable bags for screws, brads, cut film pieces and old parts. Job number written on the bag.
Our pick: Zip bags in snack and sandwich sizes
In a store: Grocery store
Macro lens over $500
What it is: A lens that focuses close enough to fill the picture with one slide or negative (1:1).
Our pick: Sigma 70 mm f/2.8 DG Macro Art, or Laowa 65 mm f/2.8 2x, in your camera's mount
In a store: Camera store
Rewinds and film viewer $25 to $100
What it is: Two hand cranks with a small lit screen between them. You wind film slowly from one reel to the other and see each frame.
Our pick: A used "dual 8 editor viewer" for Regular 8 and Super 8 (Goko, Minette, Baia)
In a store: Second-hand only
Film cleaner $25 to $100
What it is: A liquid that dissolves grime on movie film and lubricates it. Applied with a lint-free cloth.
Our pick: FilmGuard, or Edwal Anti-Stat Film Cleaner
In a store: Specialist film suppliers
Film tape splicer and splicing tape $25 to $100
What it is: A small block with pins that holds two film ends in line while pre-perforated clear tape joins them. Regular 8, Super 8 and 16 mm each need their own tape.
Our pick: A CIR or Hama style tape splicer for your gauge, with matching splicing tapes
In a store: Specialist film suppliers
White film leader under $25
What it is: Blank white film spliced to the start and end of a reel. It protects the first frames and gives the scanner something to pull.
Our pick: White acetate or polyester leader in your gauge, 50 ft roll
In a store: Specialist film suppliers
Take-up reels under $25
What it is: Empty reels that receive the film as it winds. The hub hole must match the gauge.
Our pick: 7 inch (400 ft) reels in Regular 8 and in Super 8
In a store: Second-hand, specialist film suppliers
A-D strips $25 to $100
What it is: Small paper strips that change colour from blue to yellow to measure vinegar syndrome in film.
Our pick: A-D Strips from the Image Permanence Institute
In a store: Image Permanence Institute, archival suppliers
Frame-by-frame film scanner $100 to $500
What it is: A machine that photographs each frame of 8 mm film one at a time and saves a video file.
Our pick: Kodak Reels, or Wolverine MovieMaker Pro
In a store: Camera store, Amazon
99% isopropyl alcohol under $25
What it is: Pure rubbing alcohol that evaporates with no residue. Cleans metal heads and tape paths. Never on shellac records. Never on photos.
Our pick: MG Chemicals 824 (99.9%), or pharmacy 99% isopropyl. Not the 70% kind.
In a store: Pharmacy, electronics supply
Video splicing tape and splicing block $25 to $100
What it is: Thin, strong tape made for joining magnetic tape, and a metal block with a groove that holds the two ends in line. Widths: 1/2 inch for VHS, 1/4 inch for reel and 8-track, 1/8 inch for cassette.
Our pick: Splicit splicing tape and splicing blocks, in the width you need
In a store: Audio tape suppliers
Before anything else
- 1Smell the can when you open it
Vinegar = Unit 2 hazard. Stop.
- 2Identify the gauge
Unit 3: sprocket holes and hub hole.
- 3Read the box and reel
Dates, titles and processing stamps become file names.
- 4Number every reel
Label on the reel flange and on its box.
Tools
Inspect on the rewinds
- 1Mount the reel on the left rewind
Film comes off the top, emulsion side as the viewer requires.
- 2Thread through the viewer to the take-up reel on the right
- 3Wind slowly
Let the film run lightly between gloved thumb and finger at the edges. You will feel splices, nicks and torn perforations.
- 4Stop at every problem
Mark it with a small piece of painter's tape on the edge and write it on the inspection sheet.
- 5Count splices
- 6Wind to the end, then rewind evenly
Not tight, not loose. No edges sticking out.
| What you find | What it means | Action |
|---|---|---|
| Old splice lifting or sticky | Cement or tape has failed | Remake it (below) |
| Torn or missing perforations | Scanner claw will jam here | Repair with perforation tape, or note for a sprocketless scanner |
| Edge nick | Will become a tear under tension | Reinforce with splicing tape |
| Film wavy, cupped or twisted | Shrinkage, often with vinegar smell | Supervisor. May need a sprocketless scanner. |
| White powder or crystals | Advanced decay or mold | Stop. Supervisor. |
| Mold: webs or spots | Stored damp | Mask. Clean in cleaning area. |
| Film stuck to itself, layers will not separate | Blocking from decay or water | Stop. Do not force. Supervisor. |
| Brown or rust stripe on one edge | Magnetic sound stripe | This is a sound film. Use only cleaner that is safe for stripe. |
| No leader | First frames are dirty and scratched | Add leader |
Clean the film
- 1Ventilate. Gloves on.
- 2
- 3Hold the pad lightly around the film between the two rewinds
- 4Wind slowly through the pad
About one hand-turn per second.
- 5Move to a clean part of the cloth every 2 to 3 metres
Look at the cloth: grey or brown streaks are the dirt that would have been in the scan.
- 6Let the cleaner evaporate before the film reaches the take-up reel
Leave a longer gap or wind slower.
- 7Second pass if the cloth still comes away dirty
✔ Do
✘ Do not
- Use water, window cleaner, WD-40 or household oils. Online videos show these. They damage emulsion and gum up scanners.
- Squeeze the film. Grit trapped in the cloth becomes a scratch along the whole reel.
Splices and repairs
A splice joins two pieces of film. Tape splices are our standard: they work on all film bases and can be undone.
- 1Cut out only what is destroyed
Cut on the frame line. Every frame matters to the family. Save cut pieces in the job bag.
- 2Lay both ends in the splicer, emulsion side as marked, perforations on the pins
- 3Trim both ends with the splicer blade
Ends now butt together on a frame line.
- 4Apply splicing tape across the join
Tape perforations line up exactly with film perforations.
- 5Burnish with a fingernail or the splicer's presser
No bubbles.
- 6Tape the other side as well
Regular 8 and Super 8 press tapes cover both sides or are applied twice.
- 7Flex test
The splice bends smoothly and passes through your fingers without catching.
| Repair | How |
|---|---|
| Failed old cement splice | Peel apart gently, scrape off old cement, remake as a tape splice |
| Torn perforations, picture intact | Perforation repair tape along the edge only |
| Tear into the picture | Align the tear, tape both sides across the frame |
| Missing leader | Tape-splice 1 to 2 m of white leader to head and tail. Write the reel number on the leader with marker. |
| Several small reels for one client | With client approval, splice onto one larger reel in date order with leader between. Fewer loads, steadier scan. |
Scanning
| Scanner class | Examples | What you get |
|---|---|---|
| Consumer frame-by-frame units | Kodak Reels, Wolverine MovieMaker Pro, Magnasonic FS81 | 1080p MP4, about 2 frames per second, no sound, strong compression, automatic exposure. Acceptable for viewing copies. |
| Prosumer and professional scanners | Filmfabriek HDS+, Moviestuff RetroScan, Lasergraphics ScanStation | 2K to 4K or more, uncompressed or ProRes, sprocketless transport for shrunk film, optional sound heads. Archive quality. |
| Camera on a modified projector or DIY rig | Mirrorless camera, macro lens, stepper drive | Can be excellent. Needs careful set-up. |
🏷️ Porthos station card fill in once, it saves on this computer
Scanning on a consumer frame-by-frame unit
- 1Clean the gate
Blower and a soft brush on the light table and film path before every reel. One hair in the gate is in every frame.
- 2Fit the correct reel adapter
Small hub for Regular 8, large for Super 8.
- 3Set the gauge switch
8 or Super 8. The gate mask and claw position change.
- 4Thread exactly as the diagram on the machine shows
Emulsion side as marked, under the guide pins, onto the take-up reel.
- 5Frame adjust
Use the X, Y and W (zoom) controls until the whole frame shows with a thin border on all four sides. Do not crop into the picture.
- 6Exposure
Start at 0. Lower it if white shirts and skies have no detail.
- 7Sharpness
Set to low. Built-in sharpening adds halos that cannot be removed.
- 8Record a 30 second test. Play it back on a computer.
Check framing, focus, exposure, steadiness.
- 9Record the reel. Stay with the machine.
Watch the take-up, listen for clicking.
- 10At the end, rewind through the machine's rewind path or on the rewinds, not through the gate
| If you see or hear | Likely cause | Do this |
|---|---|---|
| Picture jumps or rolls vertically | Damaged or shrunk perforations, or wrong gauge setting | Stop. Check gauge switch. Inspect film at that point. |
| Film stops moving, same frame repeats | Claw lost the perforations, or a bad splice | Stop at once. Back the film out. Repair the splice. |
| Black hair or fuzzy line at one edge all the time | Dirt in the gate | Stop, clean gate, rescan from the start |
| Flicker in brightness | Auto exposure hunting | Lock exposure if the unit allows. Note it for correction. |
| Blurry on one side | Film not flat in gate | Rethread. Check for cupped film. |
| Everything moves too fast on playback | File is 20 or 30 fps, film was shot at 16 or 18 | Conform speed in editing (below) |
After the scan: speed, crop, colour
- 1Conform the frame rate
Consumer units write files at 20 or 30 fps. Regular 8 was shot at 16, Super 8 at 18. In DaVinci Resolve: clip attributes, set the frame rate to 16 or 18, then place it on a 23.976 or 29.97 timeline.
- 2Crop to the frame edge
- 3Colour
Old colour film fades toward red or magenta. Balance on something that should be white or grey.
- 4Stabilize lightly if the frame weaves
- 5Export the access copy as MP4
Sound film
- Magnetic stripe (copper-brown line on the edge, common on Super 8) and optical track (wavy clear line, common on 16 mm).
- Consumer scanners do not read sound. A scanner with sound heads does.
- Otherwise the sound is recorded in real time from a sound projector's line output into the computer, as a separate audio capture, and synchronized to the scanned picture in editing. Supervisor only: this is the one case where film runs through a projector, and only after inspection and repair.
Vinegar syndrome and shrinkage
| Stage | Signs | Action |
|---|---|---|
| Early | Faint vinegar smell | Isolate from other film. Scan soon. Tell the client it needs cool, dry, ventilated storage. |
| Middle | Strong smell, film cups and waves | Supervisor. Sprocketless scanner. Do not force flat. |
| Late | Brittle, shrunken, white crystals, layers stuck | Often cannot be scanned. Supervisor informs the client. |
 ▶Preparing and cleaning Super 8, Regular 8, 9.5 and 16 mm film before transfer👀 Watch for: film passing through the cloth on rewindsOpens on YouTube in a new tab
 ▶Cleaning 8 mm film by hand on an editor, no talking👀 Watch for: hand speed and pressureOpens on YouTube in a new tab
 ▶Film cleaning, before and after👀 Watch for: the difference on screenOpens on YouTube in a new tab
 ▶Cleaning very moldy 8 mm film👀 Watch for: mold coming off onto the clothOpens on YouTube in a new tab
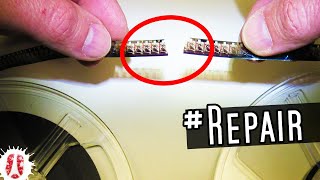 ▶Repairing a broken vintage film👀 Watch for: cutting on the frame line and tapingOpens on YouTube in a new tab
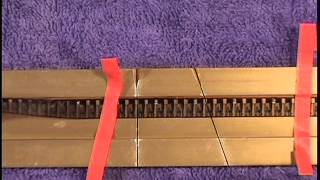 ▶Splicing broken 8 mm with press tape and a splice block👀 Watch for: lining up perforationsOpens on YouTube in a new tab
 ▶Splices for 8 mm, Super 8 and 16 mm👀 Watch for: tape applied to both sidesOpens on YouTube in a new tab
 ▶Splicing Super 8 and Double 8👀 Watch for: the splicer in close-upOpens on YouTube in a new tab
 ▶Loading film in the Kodak Reels digitizer👀 Watch for: the threading pathOpens on YouTube in a new tab
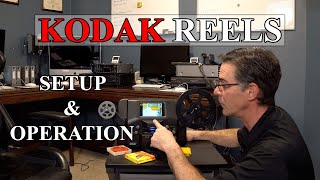 ▶Kodak Reels set-up👀 Watch for: reel adapters and frame adjustOpens on YouTube in a new tab
 ▶Frame-by-frame scanner, full tutorial👀 Watch for: the settings menuOpens on YouTube in a new tab
📝 Worksheet 10: Movie film: 8 mm, Super 8 and 16 mm
Part A: Quick check
Click one answer. Green means correct. Red means try again. You can try as many times as you need.
1. How do we look at the picture on a client's film before scanning?
✅ Projectors scratch and can burn film. Rewinds are slow and gentle.
2. Where do you cut when removing a destroyed section?
✅ Cutting on the line keeps every surviving frame whole.
3. Which splice works on every kind of film base?
✅ Cement cannot weld polyester film.
4. A consumer scanner made a 20 fps file from a Regular 8 reel. What must happen in editing?
✅ Playing 16 fps film at 20 makes everyone move 25 percent too fast.
5. A hair appears at the edge of the picture during a scan. What do you do?
✅ The hair is in every frame until removed, and often moves into the picture.
6. The built-in sharpness on a consumer scanner should be:
✅ Baked-in sharpening halos cannot be undone.
7. Film is wavy and smells strongly of vinegar. Where is it stored?
✅ Acid vapour spreads the decay to healthy film.
8. Which of these do we never use to clean film?
✅ They damage emulsion or leave residue.
Part B: Hands-on practice
Do each task with real equipment and practice media. Tick it when you have done it. Your trainer signs when they have watched you do it.
| I did it | Task | Trainer initials |
|---|---|---|
| Tell Regular 8, Super 8 and 16 mm apart and fit the correct reel adapter for each. | ||
| Thread practice film on the rewinds and inspect a full reel, marking every splice and fault. | ||
| Clean a practice reel with film cleaner and show the dirty cloth. | ||
| Make 5 tape splices that pass the flex test. | ||
| Repair a section of torn perforations. | ||
| Add head and tail leader to a reel and label it. | ||
| Thread the scanner, set framing and exposure, and record a correct 30 second test. | ||
| Scan a full practice reel and conform it to the correct speed. |
Part C: Write or draw your answer
1. Describe what you feel and see when you find a bad splice on the rewinds.
2. Explain why film scanned at 20 fps must be slowed to 16 or 18 fps.