Audio tape: cassettes, microcassettes, reel to reel and 8-track
Playing, repairing and capturing every kind of audio tape, with levels, azimuth, speeds, track layouts and the fixes each format needs before it can be played.
🧰 What you'll need
Every tool and supply named in this unit. Dotted-underlined words in the text jump back here. Buttons open that store's search for the exact product. Prices are rough ranges in Canadian dollars.
White film leader under $25
What it is: Blank white film spliced to the start and end of a reel. It protects the first frames and gives the scanner something to pull.
Our pick: White acetate or polyester leader in your gauge, 50 ft roll
In a store: Specialist film suppliers
Take-up reels under $25
What it is: Empty reels that receive the film as it winds. The hub hole must match the gauge.
Our pick: 7 inch (400 ft) reels in Regular 8 and in Super 8
In a store: Second-hand, specialist film suppliers
S-Video and RCA cables under $25
What it is: S-Video is a round plug with 4 pins that carries picture. RCA plugs are the red and white (sound) and yellow (picture) plugs.
Our pick: 6 ft S-Video cable and a red/white/yellow RCA cable
In a store: Electronics store
99% isopropyl alcohol under $25
What it is: Pure rubbing alcohol that evaporates with no residue. Cleans metal heads and tape paths. Never on shellac records. Never on photos.
Our pick: MG Chemicals 824 (99.9%), or pharmacy 99% isopropyl. Not the 70% kind.
In a store: Pharmacy, electronics supply
Rubber roller cleaner under $25
What it is: A liquid that cleans and revives the rubber pinch rollers in tape machines.
Our pick: MG Chemicals Rubber Renue (408A)
In a store: Electronics supply
Video splicing tape and splicing block $25 to $100
What it is: Thin, strong tape made for joining magnetic tape, and a metal block with a groove that holds the two ends in line. Widths: 1/2 inch for VHS, 1/4 inch for reel and 8-track, 1/8 inch for cassette.
Our pick: Splicit splicing tape and splicing blocks, in the width you need
In a store: Audio tape suppliers
Donor shells under $25
What it is: An empty cassette shell taken from a tape nobody needs. A client's tape reels are moved into it when their own shell is broken.
Our pick: Screwed-together VHS tapes and 5-screw audio cassettes
In a store: Thrift stores
USB audio interface $100 to $500
What it is: A box that takes the red and white sound outputs from a deck and sends clean digital audio to the computer.
Our pick: Focusrite Scarlett 2i2. Budget: Behringer U-Control UCA202.
In a store: Music store (Long & McQuade)
Closed headphones $100 to $500
What it is: Headphones that cover the ears, so you hear faults in the recording and not the room.
Our pick: Sony MDR-7506
In a store: Music store
Cassette pressure pads under $25
What it is: Tiny felt pads on a springy metal strip. They press the tape against the head.
Our pick: Replacement cassette pressure pads on springs, pack of 20 or more
In a store: Online
8-track pads and sensing foil under $25
What it is: Replacement foam pressure pads and the metal foil tape that joins the loop and changes programs.
Our pick: 8-track repair kit: pads plus 1/4 inch sensing foil strips
In a store: Online 8-track specialists
Microcassette player $25 to $100
What it is: A pocket recorder that plays microcassettes. It needs a speed switch (2.4 and 1.2) and a headphone or earphone jack.
Our pick: A used Sony or Olympus microcassette recorder with two speeds, plus a 3.5 mm to RCA cable
In a store: Second-hand, some office suppliers
The audio capture chain
- 1Player line output
RCA "LINE OUT" or "REC OUT". Not the headphone jack unless there is nothing else.
- 2Audio interface
A USB audio interface with line inputs. Not the computer's microphone jack.
- 3Audacity (free) on the computer
Project rate 96000 Hz (or 48000), 24-bit, stereo.
- 4Headphones
You must listen while it records.
- Master
- WAV 24-bit, 96 kHz (48 kHz minimum)
- Peaks
- About -6 dB, never 0
- Channels
- Stereo, even for mono tapes
- One file
- Per side or per program
- Noise reduction
- None on the master
🏷️ Porthos station card fill in once, it saves on this computer
Recording in Audacity
- 1Audio Setup: choose the interface as Recording Device, 2 channels
- 2Set project rate and 24-bit
- 3Click the recording meter to start monitoring
- 4Play the loudest part of the tape. Adjust the interface gain so peaks reach about -6 dB.
- 5Rewind. Press Record in Audacity, then Play on the deck.
- 6Listen for the first minute, then check every 10 minutes
- 7At the end, stop. File, Export Audio, WAV 24-bit.
Name it. Save the Audacity project too.
- 8Flip the tape and repeat for side B
Compact cassettes
| Check | What to look for |
|---|---|
| Shell | Cracks, missing screws, warped |
| Pressure pad | The small felt pad on a metal spring behind the tape at the centre opening. Missing or loose pad = muffled, wobbly sound. |
| Tape | Wrinkles, slack loop, snapped at the leader |
| Type | Notches on the top edge: none extra = Type I normal; extra pair = Type II chrome; third pair = Type IV metal |
| Dolby | Label or J-card says Dolby B, C or dbx |
| Length | C120 tape is very thin. Play only. Never fast-wind it more than needed. |
- 1Take up slack
Turn a hub with a pencil or finger until the tape is taut.
- 2Fast forward and rewind once
Repacks the tape.
- 3Clean the deck's head, capstan and pinch roller
Swab with 99% isopropyl on the metal parts. Rubber cleaner on the roller.
- 4Set the tape type switch if the deck is not automatic.
- 5Dolby
Start with Dolby OFF for the master. If the label says Dolby B and it sounds too bright and hissy, make the capture with it off and note it; decoding can be applied later.
- 6Azimuth
See below.
- 7Capture side A, then side B
Azimuth: the big quality hack
Azimuth is the angle of the playback head against the tape. If the recorder that made the tape had a slightly tilted head, the tape sounds dull on every other machine.
- 1Play the tape in mono
Use the interface or software mono switch.
- 2Turn the small azimuth screw beside the playback head a fraction of a turn
Supervisor shows you which screw. Non-magnetic screwdriver.
- 3Listen for the brightest, clearest highs
Speech "s" sounds become crisp.
- 4Go past the best point, then come back to it
- 5Capture. Mark the starting position first so the deck can be reset.
Cassette repairs
| Problem | Fix |
|---|---|
| Pressure pad missing or loose | Screw shell: open it and glue a new pad to the spring with a tiny drop of contact cement, or move the tape into a donor shell. Welded shell: move the tape to a donor shell. |
| Tape snapped | Splice on a splicing block: butt join, splicing tape on the shiny back (the side facing out of the cassette). Trim flush. |
| Tape off the leader | Splice it back to the leader |
| Welded (no screws) shell cracked or jammed | Carefully split the seam with a blade, move the spools to a 5-screw donor shell |
| Tape wrinkled for a short length | Capture through it. A wrinkle is better than a gap. |
| Squealing tape | Stop. Sticky tape. Supervisor. |
Microcassettes and mini-cassettes
- They look alike. A microcassette has two capstan holes like a tiny normal cassette. A mini-cassette has none, and is driven by its hubs.
- Speeds: 2.4 cm/s (standard) and 1.2 cm/s (long play). Wrong speed = chipmunk or slow-motion voices. Switch speed on the player.
- Players are dictation machines with only a headphone or earphone jack. Use that jack into the interface at low volume, about one third, and raise gain on the interface.
- Answering-machine tapes may be endless loops or have messages recorded at odd speeds. Capture, then correct speed in Audacity (Effect, Change Speed).
Reel to reel
| Thing to identify | How |
|---|---|
| Speed | 1⅞, 3¾, 7½ or 15 inches per second. Try 3¾ first for home tapes, 7½ for music. Correct speed = voices sound natural. |
| Track layout | Use the diagram. If you hear a second recording playing backwards underneath, the tape is quarter-track or half-track mono and both sides are being read at once. |
| Base material | Hold the reel to a lamp. Acetate lets light through the tape pack and snaps cleanly when pulled. Polyester is opaque through the pack and stretches. |
| Back coating | Matte black back = back-coated, the type most prone to sticky-shed (many 1970s to 1990s Ampex and Scotch studio tapes) |
| Wind | "Tails out" tapes are stored played-through: the end is on the outside. Rewind before play. |
- 1Clean the whole tape path
Heads, guides, capstan, lifters, with isopropyl. Pinch roller with rubber cleaner.
- 2Supply reel on the left, empty take-up reel of the same size on the right
- 3Thread
Follow the deck's path drawing: around the tension arm, past the heads (oxide side, usually dull, toward the heads), between capstan and pinch roller, around the right tension arm, onto the take-up reel.
- 4Wind 3 turns by hand to lock the tape
- 5Set speed and reel size switches
- 6Play 10 seconds. Listen. Look at the heads.
Brown dust on the heads or squealing = stop.
- 7Capture the whole pass
- 8Flip the reels for side B if the tape has one
Or, if the deck reads all 4 tracks, capture once and reverse two of them in Audacity.
✔ Do
- Add leader tape to both ends if the tape has none. Splice with ¼ inch splicing tape on the back.
✘ Do not
- Fast-wind old acetate tape at full speed. It snaps.
8-track cartridges
Almost every 8-track needs service before it is played once. Playing first is how they get eaten.
- 1Look at the open end
Foam pad behind the tape: is it springy, or crumbling to dust or goo? Rubber pinch roller: firm, or melted and sticky?
- 2Open the cartridge
Some have a screw. Most have plastic tabs: release each with a thin blade. Some RCA types are riveted. Photograph the tape path.
- 3Replace the foam pad
Scrape off all old foam. Fit new adhesive foam or a spring-pad kit of the same thickness.
- 4Find the sensing foil splice
Pull tape gently from the centre of the reel until the metal foil appears. Old foil falls off and the tape loop comes apart inside the player.
- 5Replace the foil
Remove old foil and adhesive. Butt the two tape ends on a splicing block. Apply new sensing foil tape across the join on the back (non-oxide side), trim flush.
- 6Pinch roller
If gooey: replace from a donor cartridge.
- 7Reassemble. Turn the roller by hand to check the loop moves freely.
- 8Play and capture all 4 programs
Each press of the program button moves the head to the next pair of tracks. Capture program 1, 2, 3, 4 as four files.
✔ Do
✘ Do not
- Rewind. 8-tracks run one way only.
- Pull tape from the outside of the reel
After capture: tidy the access copy
- Trim silence at start and end. Leave 1 second.
- Split long sides into tracks with labels (Unit 17).
- Light noise reduction only on the access copy, never the master.
- Export MP3 320 kbps. Name by side and content.
| If you see or hear | Likely cause | Do this |
|---|---|---|
| Dull, muffled sound | Dirty head, azimuth, pressure pad, or wrong tape type setting | Clean, check pad, set azimuth |
| Sound wobbles in pitch (wow and flutter) | Dirty or hardened pinch roller, sticky tape, worn belt | Clean roller. Try another deck. Supervisor. |
| One channel missing | Dirty head, bad cable, mono recording on one track | Clean. Swap cables left to right to test. Mono tape: copy the good channel to both. |
| Voices too fast or too slow | Wrong speed | Change deck speed, or correct in Audacity |
| Backwards talking underneath | Other side's tracks being read | Wrong head type. Capture and separate in software. |
| Distortion on loud parts in the file | Recording level too high | Lower gain. Recapture. |
| Hum | Ground loop or bad cable | Plug deck and interface into the same power bar. Replace the cable. |
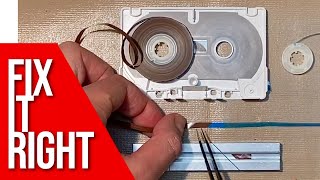 ▶Fixing cassettes: open, splice, repair the pad👀 Watch for: welded shells being openedOpens on YouTube in a new tab
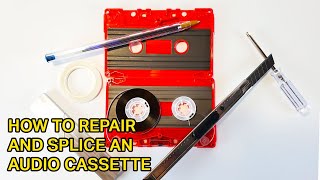 ▶Splicing and repairing an audio cassette👀 Watch for: the splicing blockOpens on YouTube in a new tab
 ▶Complete pressure pad replacement👀 Watch for: pad and spring going back inOpens on YouTube in a new tab
 ▶Repairing a cassette pressure pad👀 Watch for: what a missing pad looks likeOpens on YouTube in a new tab
 ▶Cleaning a reel to reel player👀 Watch for: every part of the tape pathOpens on YouTube in a new tab
 ▶Cleaning play, record and erase heads👀 Watch for: swab technique on fixed headsOpens on YouTube in a new tab
 ▶Caring for a reel to reel machine👀 Watch for: the full routineOpens on YouTube in a new tab
 ▶Fixing sticky shed tapes: baking guide👀 Watch for: which tapes need it and the dehydratorOpens on YouTube in a new tab
 ▶Sticky shed and baking reel tapes👀 Watch for: shedding on the headsOpens on YouTube in a new tab
 ▶8-track foam pad replacement👀 Watch for: scraping old foam and fitting newOpens on YouTube in a new tab
 ▶8-track sensing foil splice repair👀 Watch for: finding and replacing the foilOpens on YouTube in a new tab
 ▶How I repair 8-track tapes👀 Watch for: pad and foil in one sessionOpens on YouTube in a new tab
 ▶Repairing an 8-track, step by step👀 Watch for: opening the cartridgeOpens on YouTube in a new tab
 ▶Recording into Audacity from start to finish👀 Watch for: levels and exportOpens on YouTube in a new tab
📝 Worksheet 13: Audio tape: cassettes, microcassettes, reel to reel and 8-track
Part A: Quick check
Click one answer. Green means correct. Red means try again. You can try as many times as you need.
1. Which output on a cassette deck goes to the audio interface?
✅ Line out is a fixed, clean level made for recording.
2. Where should the loudest peaks sit while recording?
✅ It leaves headroom so nothing clips, while staying well above the noise.
3. A cassette sounds muffled on every deck. What two things do you check first?
✅ A missing pad or a tilted head angle causes most dull cassettes.
4. You hear backwards speech under the main recording on a reel. What is happening?
✅ Track layouts differ. We capture and separate or reverse in software.
5. Brown powder builds up on the heads and the tape squeals. What do you do?
✅ Sticky-shed. Continuing scrapes the recording off.
6. What must be checked on an 8-track before it is played even once?
✅ All three perish with age and the player then eats the tape.
7. How many programs does an 8-track have?
✅ Eight tracks are played as four stereo programs.
8. Which tape must never be baked?
✅ Heat destroys acetate. Baking only helps certain polyester tapes with binder breakdown.
9. A microcassette plays like chipmunks. What is wrong?
✅ 1.2 cm/s recordings played at 2.4 are double speed.
Part B: Hands-on practice
Do each task with real equipment and practice media. Tick it when you have done it. Your trainer signs when they have watched you do it.
| I did it | Task | Trainer initials |
|---|---|---|
| Connect a deck to the interface and set a correct recording level. | ||
| Capture both sides of a practice cassette to correctly named WAV files. | ||
| Identify tape type and Dolby marking on 5 cassettes. | ||
| Replace a pressure pad or move a tape to a donor shell. | ||
| Splice a snapped practice cassette tape. | ||
| Adjust azimuth by ear with a supervisor, and return the deck to its marked position. | ||
| Thread the reel to reel deck and identify speed and track layout of a practice tape. | ||
| Tell acetate from polyester tape using the lamp test. | ||
| Service a practice 8-track: new pad and new foil splice, then capture all 4 programs. | ||
| Reverse a backwards track and correct a wrong-speed capture in Audacity. |
Part C: Write or draw your answer
1. Describe the lamp test for acetate and polyester tape.
2. Why do we never rewind an 8-track?